a standard lived-in communal hallway inside an East London mansion block

Whose Job Is It to Clean Communal Hallways in a London Mansion Block?

Ask ten people in a mansion block who is meant to clean the stairs and you will get several confident, contradictory answers. It is the freeholder. It is the managing agent. It is whoever’s turn it is. It is nobody, which is why they look the way they do. The real answer is duller than any of those and a good deal more useful, and it is written down in a document most residents have never read past the first page.

So who is actually responsible – the freeholder or the residents?

In almost every London mansion block the communal areas – the entrance lobby, the stairs, the landings, the lift, the bin store – belong to the freeholder, not to any of the leaseholders. You own your flat on a long lease. You do not own the hallway outside your door, not even the stretch of it you cross every single day. And because the freeholder owns those parts, keeping them clean is the freeholder’s responsibility to arrange. That is the short answer, and it catches out people who assume that because they pay for the cleaning, the doing of it must somehow be theirs to sort out.

The lease is the rulebook

Every one of these questions has the same final authority: the lease. Your lease sets out what counts as the “common parts”, and it puts two obligations in place – the landlord must keep those parts clean and maintained, and you must pay a share of the cost through the service charge. So the two halves people muddle together are, on paper, quite separate. Whose job is it to arrange the cleaning? The freeholder’s. Who pays for it? You do, along with every other leaseholder, split between you as the lease dictates. I am a cleaner, not a solicitor, so for anything genuinely contested the wording of your own lease is the last word – but that split is the pattern in nearly every block I have worked in.

If leaseholders pay for it, why does the freeholder arrange it?

It sounds back to front – you foot the bill, but someone else picks the cleaner. The reasoning is that the communal parts are shared, so one party has to take charge of them on everyone’s behalf, and the lease hands that role to whoever owns them. In practice the freeholder rarely lifts a finger themselves. They appoint a managing agent, and the agent runs the block day to day: collecting the service charge and hiring the contractors who actually turn up with the mop. That cleaning contract usually covers the halls, the staircases, the lobby, the communal glass and the bin store on a set rota – daily in a grand block, weekly in a modest one.

Where the managing agent fits in

So the cleaner in your hallway on a Tuesday morning is almost never employed by the freeholder, and never by you. They work for a cleaning company hired by the managing agent, who acts for the freeholder and pays that company out of the service charge you and your neighbours fund. It is a chain with several links, and every link is somewhere the standard can quietly slip. In the grander blocks there may still be a porter or caretaker on site – a tradition London has largely let fall away – who oversees or even does some of the cleaning, but even they answer back up the same chain. The managing agent is the one you deal with when things go wrong. On paper they answer to the freeholder; in practice, since it is your money funding the whole arrangement, they answer to you as well, and the good ones behave as though they know it.

What about blocks that manage themselves?

Not every block leaves it to a distant freeholder and an agent. In plenty of London blocks the leaseholders have taken the reins, either by clubbing together to buy the freehold – share of freehold, as the estate agents like to advertise it – or by exercising the Right to Manage, which lets them take over the running of the block without owning the freehold at all. Either way, the job of arranging the cleaning moves to a company the residents themselves run.

Right to Manage and share of freehold

The catch, if it is one, is that self-management does not make the cleaning free or the responsibility disappear. It moves both onto the residents’ own management company, which still has to hire and pay a contractor out of everyone’s service charge, and still has to field the grumbling when the stairs are grubby. What changes is that the people making the decisions now live in the building, which tends to concentrate the mind. The blocks I see with the best-kept communal areas are very often the self-managed ones, where the person signing off the cleaner’s invoice also has to climb the stairs every night. Ex-council and housing-association blocks run differently again – there the landlord is the council or the association, and the cleaning is their duty, funded through rent or a service charge depending on how you hold the flat.

Where does “communal” end and your flat begin?

The boundary matters, because it decides what you can be asked to clean and what you cannot. What you own – your “demise”, in the language of the lease – almost always stops at the internal surfaces of your flat: your side of the front door, and everything behind it. The moment you step onto the landing you are in common parts. That worn patch of carpet outside your door, the tiled entrance hall you walk across with your shopping – none of it is yours to clean, and none of it is yours to neglect either. Many of these blocks still have their original encaustic tiled floors and stone stairs at the entrance, which want proper care rather than a slosh of bleach, and that too is the contractor’s remit, not yours.

The doormat and the fire-exit rule

Two things complicate the tidy version of that boundary. The first is the doormat, the potted plant, the bike, the buggy, the stack of parcels – the personal clutter that migrates out of flats and onto the landing. The common parts are meant to stay clear, on paper at least and in most leases, and increasingly it is a fire-safety matter as much as a cleaning one. A cluttered corridor is a blocked escape route, and agents across London have been clearing landings hard since the fire regulations tightened. The second complication is mess that one resident causes – the grit and dust tracked through the halls during a flat’s renovation, say. General cleaning is the contractor’s job; the trail of builder’s dust leading to your bathroom refit is yours, under the same lease terms that stop you making a nuisance of yourself to your neighbours.

What should you do if the hallways are filthy and nobody is cleaning them?

This is where most of the frustration lives, and where people most often do the wrong thing. If the communal cleaning is not happening, or is being done so poorly it may as well not be, the answer is not to roll up your sleeves. It is to hold the people already responsible to the standard you are already paying for. Start with the lease and the service-charge accounts, which between them tell you what cleaning you are entitled to and roughly what is being spent on it. Then put your complaint to the managing agent in writing, point at the specific obligation in the lease, and ask to see the cleaning schedule – how often it is meant to happen and what the contractor is actually signed up to do. A surprising number of blocks pay for a weekly clean, receive a monthly one, and have never once asked to see the paperwork. Do this collectively rather than alone where you can – a residents’ association, or a well-attended AGM, carries far more weight with an agent than one annoyed leaseholder ever will, and it spreads the effort so the whole thing does not land on a single person. If the agent stonewalls, the service charge itself can be challenged at the First-tier Tribunal, which can rule on whether what you are charged is reasonable and whether the service was in fact delivered.

Don’t reach for the mop yourself

Here is the part that goes against the grain: however filthy the hallway gets, do not start cleaning it yourself. I know the instinct – it is right there and quick, and a scrubbed landing is more pleasant than a dirty one whoever paid for it. But the moment a resident quietly takes over the communal cleaning, three things happen. The managing agent’s failure stops being visible, and the pressure to fix it drains away. The standard becomes whatever one tired neighbour can manage on a Sunday. And you begin doing, for nothing, the exact job your service charge is meant to buy, which cuts the ground from under you the day you finally do complain.

I watched this play out in a red-brick block on Prince of Wales Drive in Battersea, where one resident had spent the best part of a year mopping the main staircase herself because the contracted cleaner kept not turning up. Everyone was quietly grateful. Nobody chased the agent, because the stairs looked perfectly fine. When she moved out, the block found it had been paying, all that time, for a service it had not received in months, with not a single logged complaint to prove it. Her kindness had cost her neighbours a year of bargaining power.

The clean hallway you are owed is bought and paid for on your service charge; the work genuinely left to you is making the people you pay actually deliver it. So put the communal mop back where you found it. That staircase was a paid job before you moved in and it will be one long after you leave, and at no point in between does it quietly become yours.

What Can a Professional Cleaner Realistically Do In a Two-hour Visit to a London Flat?

Two hours sounds like a long time until someone is actually cleaning your flat, at which point it turns out to be about long enough to do the kitchen and the bathroom properly and not a great deal besides. Most of the disappointment I see in this job comes down to that one gap – the distance between what two hours feels like from the sofa and what it covers with a cloth in hand. None of it is a mystery, though, once you do the arithmetic.

What does two hours actually buy you?

A standard two-hour visit is a maintenance clean. It keeps an already-reasonably-kept flat on top of itself: kitchen surfaces and hob wiped down, sink cleared and cleaned, the bathroom scrubbed, floors vacuumed and the main ones mopped, accessible surfaces dusted, bins emptied, mirrors and glass done. In a one-bed flat that has been cleaned in the last week or two, all of that fits, and fits without rushing. The trouble starts when the flat is bigger than that, or has more on its surfaces than a cleaner can work around.

And “done properly” is not the same as spotless. A maintenance clean leaves a flat clean and presentable – wiped, mopped, fresh-smelling, the obvious dirt gone. It does not get every grout line white or every limescale spot off the taps; that is deep-clean territory and a longer visit. Small London kitchens are often quick precisely because they are small; it is the bathrooms, especially an over-bath shower boxed in with tiles and a screen, that eat the time.

The room-by-room maths

It helps to see where the time actually goes. In a typical one-bed London flat the kitchen takes the largest single share – call it forty minutes for the worktops, the hob, the splashback, the sink, the outsides of the units and the floor. The bathroom is next; call it twenty-five to thirty for the loo, basin, bath or shower, tiles, mirror and floor. Floors across the rest of the flat, vacuumed and mopped, are another twenty. Dusting, glass, bins and the general putting-right of surfaces take the last twenty-odd. Add the few minutes of getting in, filling a bucket, moving room to room and packing up again, and your two hours are gone. There is no slack in it anywhere. Every extra room and every second bathroom pushes something else off the list, which is why a two-bed with two bathrooms is a different proposition entirely, and rarely a two-hour one.

Which jobs quietly eat the clock?

Some flats are simply slower than others, and it is not always the dirty ones. The biggest single variable is not grime at all. It is how much stuff is sitting on the surfaces that need cleaning.

Why clutter is the real enemy

Tidying is not cleaning, and the tidying is your job, not the cleaner’s. I know how that lands. You are paying someone precisely so you do not have to think about the flat, and being told to tidy before they arrive feels like doing your homework before the tutor turns up. But a cleaner cleans surfaces, and a surface buried under post, keys, chargers and yesterday’s mugs cannot be cleaned – it can only be shuffled. Every minute spent moving your belongings off a worktop and putting them back is a minute not spent on the dirt underneath, and it is the least useful thing you can pay a professional to do. Clear the decks before the visit and the same two hours cleans close to twice as much.

After clutter, the other big variable is bathrooms; two of them in a two-bed can take nearly as long as everything else combined. Pets add time too, because hair gets everywhere and doubles the vacuuming. And the age of the building matters more than people think. Period conversions all over London, with their picture rails and deep, dust-holding skirtings, hold dirt in corners a modern flat simply does not have. Hard water does the rest: London’s limescale furs up the taps and the shower glass faster than almost anywhere in the country, so bathrooms here want more attention than they would in a soft-water town.

What falls outside a standard two-hour visit?

A maintenance clean has a natural edge to it, and a fair amount of work lives on the far side of that edge. The oven, cleaned properly on the inside, is a job in its own right – the baked-on carbon needs soaking and its own products, and it can swallow an hour by itself. Windows beyond a quick wipe of the insides, particularly sash windows and anything above the ground floor, are specialist work. So is descaling a shower screen or a loo that has been left to fur up over months, because limescale needs time to soak rather than muscle, and time is the one thing a two-hour visit has none of going spare.

The jobs that need their own booking

The same is true of the deeper, once-in-a-while tasks: skirting boards throughout the flat, the insides of the kitchen cupboards, cleaning behind and beneath heavy furniture, walls and paintwork, and any real decluttering. None of these get refused. They are simply their own bookings – either a longer deep-clean visit, or a single task folded into a rota so it comes round every few weeks. Ironing and laundry sit in the same bracket: some cleaners take them on, but every shirt ironed is fifteen minutes not spent cleaning, so it wants agreeing in advance rather than assuming. The rule of thumb is plain enough. If a job needs soaking time or heavy furniture moved, it is not a two-hour job stacked on top of everything else.

Two other things sit firmly outside as well. An end-of-tenancy clean is not a long maintenance visit; it is a specified, top-to-bottom job measured against a checklist an inventory clerk will mark, and it takes the best part of a day for a flat of any size. It is the most common booking mix-up I get from renters – a move-out clean asked for at a maintenance price and length. And a cleaner is not a handyperson: recurring mould or a cracked seal letting water behind the bath are repairs, not cleaning, and wiping over them only hides the trouble until next month.

Why can’t the first visit get everything?

There is a real difference between a flat cleaned every week and a flat being cleaned for the first time in a year, and it is bigger than most people expect. A regular clean holds a standard that is already there. A first clean has to climb up to that standard from wherever the flat happens to be, and if that is a long way down, two hours will not carry you all the way.

Getting to baseline

I remember a two-bed on Fordwych Road, up towards West Hampstead – a first clean booked as a standard two hours, where the client had also expected the oven and the insides of the windows done. Every worktop was under dishes and every chair carried a week of laundry. Between moving enough of that to reach the surfaces and getting the kitchen and bathroom genuinely clean, the two hours were gone, and the oven never got a look-in. She was not pleased, and I understood why – but no cleaner alive was getting that flat, in that state, fully done in two hours. The second visit, with the surfaces already clear and the baseline half-set, got through easily twice as much. Call it two or three visits before a neglected flat settles into an honest maintenance clean, and then it holds. You cannot skip to the second part.

One quieter thing slows a first visit too: what there is to clean with. A cleaner who arrives to a single worn sponge and a half-empty spray bottle loses time no method can win back. Most professionals bring their own kit for exactly this reason, but if yours does not, sorting out decent supplies and a vacuum that actually pulls before they arrive is time well spent.

How do you get the most out of the two hours?

Plenty of what makes a two-hour clean feel worth the money is decided before the cleaner even arrives, and most of it is in your hands. Briefing matters most. If the kitchen and bathroom are the priority this week, say so out loud, because a cleaner who knows what you care about spends the time where you want it rather than guessing and spreading it thin. “Do the wet rooms properly and skip the spare room” is a genuinely useful instruction, not a rude one.

Brief them, then clear the decks

Clearing the surfaces beforehand matters nearly as much. Counters, the dining table, the bathroom floor – anything a cleaner would otherwise burn time moving first. And it pays to think in rotas rather than isolated visits. The floors and the wet rooms want doing every time, while the deeper jobs – the inside of the fridge, the skirtings, the window sills, the tops of the wardrobes – can rotate, one per visit, so the flat stays level without any single clean trying to do the lot. A standing arrangement like that gets far more out of two hours than the same two hours booked cold, over and over, with a fresh dose of disappointment each time.

It also pays to keep the same cleaner. Someone who has done your flat a dozen times knows where the dust gathers and which cupboard the mop lives in, and that familiarity alone shaves minutes off every visit. And be honest with yourself about frequency: a flat cleaned fortnightly carries twice the build-up of one cleaned weekly, so the same two hours will show less for it. Neither is wrong, but the maths is the maths.

Give your cleaner clear counters and an empty sink, and two hours goes a long way. Leave everything where it lies, and the first twenty minutes go on just making room to start.

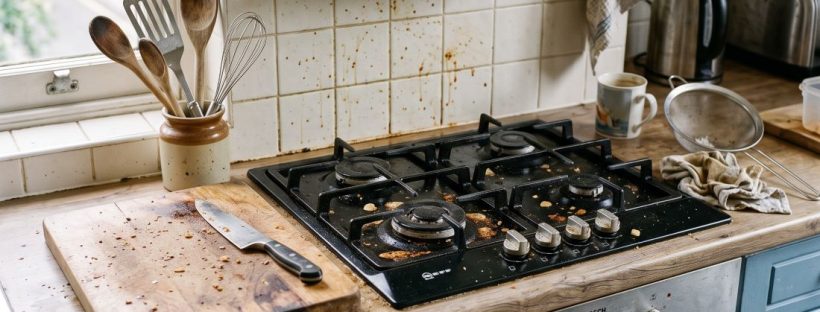
grease splatters and cooking residue built up around the burners, splashback, and nearby worktop

How To Clean Dried-on Grease From A Kitchen Splashback Behind The Hob

There are two kinds of grease on the splashback behind your hob, and only one of them ever comes off easily. The fresh splatter from tonight’s dinner wipes away with a damp cloth. The layer underneath – older and harder, gone a faint amber like a coat of varnish someone forgot about – does not budge, and that is the layer people mean when they say the grease behind the hob is impossible.

It is not, quite. But you have to stop treating it like grease.

Why does grease behind the hob turn hard instead of wiping off?

By the time it has gone amber and solid it is barely grease any more. It is polymerised oil, and the thing that made it is the same process that seasons a cast-iron pan – heat, oxygen and time, doing to your wall exactly what a chef does deliberately to a skillet.

When cooking oil turns to varnish

Every time you fry, a fine mist of oil lifts off the pan and settles on the wall behind. On its own that would wipe straight off. The trouble is that the splashback sits directly in the path of the hob’s heat, so every later time you cook, you bake that thin film a little further. Heat and oxygen make the oil cross-link, its molecules bonding into longer and longer chains, until the soft splatter has set into a hard golden lacquer that grips the surface the way seasoning grips iron. A gas hob is the worst offender, throwing grease-laden heat straight at the wall; induction is kinder, though it still spits. Whatever the heat source, you end up cleaning a coating that the cooking built on purpose, which is why a cloth and a squirt of washing-up liquid get you precisely nowhere.

The extractor hood is part of this story too. Its filter is meant to catch the grease-laden air before it can land anywhere, and when that filter is clogged or the fan is switched off, all of that oil goes onto the wall and the cupboard fronts instead. A splashback that keeps rebuilding its lacquer no matter how often you clean it is very often the sign of a hood filter nobody has touched in two years.

What actually cuts through baked-on grease?

Grease is undone by alkalis, not acids. An alkaline cleaner reacts with the fat and turns part of it into something soap-like and water-soluble – the same reaction, more or less, that soap-making has run on for centuries. So the useful cleaners are the alkaline ones. The alkaline options run mild to strong. Washing-up liquid handles a light film. For heavier build-up you want a dedicated kitchen degreaser, and the trade ones tend to be stronger than the supermarket sprays, or you fall back on good old sugar soap. Bicarbonate of soda worked into a paste adds a little gentle scrub where you want it.

Warm everything first. Grease softens with heat, so a warm surface and a warm solution do half the job before you have wiped a thing – run the tap hot, and I do mean hot, or give the wall a minute under a hot damp cloth to take the chill off it. One safety line while we are here: never mix a degreaser, or anything else, with bleach in that cramped corner behind the hob. The fumes are no joke in a space with poor airflow.

For the rare fleck that shrugs off even a warm degreaser and a proper wait, a dab of white spirit on a cloth will dissolve pure oil where water-based cleaners stall – fine on glass and glazed tile, though not on paint or plastic, and always with a window open. Most kitchens never need to go that far. Plain washing-up liquid, given enough heat and dwell time, clears the great majority of everyday build-up on its own.

Give it time, not muscle

Here is where most people lose the battle. They spray and wipe it straight off, then scrub harder when nothing happens. The chemistry needs time. Spray or paste the degreaser on, then walk away and leave it – five minutes for a light film, ten or fifteen for a bad one, and I do mean leave it, not hover an inch away with the cloth in your hand. When you come back the lacquer has gone soft and slack, and it lifts off with a non-scratch pad and almost no effort. If a patch holds on, put more on and wait again rather than reaching for the wire wool. Warm, wet and alkaline – that is the whole method, and the scrubbing you were bracing yourself for is the part you can mostly skip.

Does the vinegar-and-bicarbonate trick actually work on it?

Short answer: no. Not on baked-on grease, anyway.

Bicarbonate of soda is a mild alkali. Vinegar is a mild acid. Tip them together and they cancel each other out, fizzing up into carbon dioxide and salty water – sodium acetate, if you want the name for it – with none of the alkalinity that would have cut the grease and none of the acidity left either. The dramatic foam everyone loves is the sound of your two ingredients neutralising themselves. Apart, they each earn their place: bicarbonate as a gentle scrub, vinegar for limescale and the cloudy marks hard London water leaves on glass. Poured over grease as a pair, they do next to nothing except look busy in a video.

None of which makes the pairing worthless everywhere. Tipped down a sluggish drain the fizz gives a mild mechanical flush, and bicarbonate on its own is a fair deodoriser for a bin or a fridge. The mistake is carrying that reputation over to a job it cannot do. Grease on a hot wall needs sustained alkalinity, and a reaction that burns itself out in thirty seconds of foam has nothing left to give it.

One or the other, never the fizz

A tenant on Bellenden Road in Peckham had a glass splashback the colour of weak tea, years of the previous occupant’s wok cooking baked onto it. She had found the vinegar-and-bicarbonate trick somewhere online and gone at it for most of an afternoon, and the glass was every bit as amber when she finished as when she started, only wetter. A warm alkaline degreaser, left to sit for a quarter of an hour, took most of it off in a single pass. The volcano makes a good clip for your phone. It does not make a clean wall.

How do you clean it off glass, tiles or steel without scratching?

The right method changes with the surface, and so do the ways to ruin it.

The razor blade held flat

On a toughened glass splashback – the default in half the new London kitchens I walk into – the degreaser does most of the work, and for the last baked-on flecks a razor blade or a window scraper laid flat against the glass, at a shallow angle, will shave them away without leaving a mark. Flat is the word that matters. Tip the blade up and you will score the glass for good. Keep the surface wet the whole time you are scraping.

Tiles themselves are easy; the grout is the weak point, because grease soaks into the porous lines and yellows them. That wants a stiff-bristled brush, the degreaser worked right into the joints, then a proper rinse. Regrouting a hob splashback is a miserable Sunday, so it pays to keep the lines clean before they stain for keeps.

Stainless steel marks easily and scratches more easily still. Work with the grain of the metal rather than across it, and use a soft cloth in place of any kind of pad. Keep bleach and anything chlorine-based well away from it – chloride pits stainless steel, and that damage does not buff back out. On the cheaper acrylic and laminate panels, keep solvents and abrasives off altogether; they cloud and scratch, and once the surface has gone dull it never comes back clear. If your splashback is only painted plaster, go gently, because a strong degreaser will take the emulsion off with the grease.

One thing worth knowing about glass: it feels tough enough to take a green scourer, and it will survive the scourer, but the fine scratches you leave behind dull the surface and give the next round of grease somewhere to key into. The blade held flat does no such damage. And the mist travels much further than the splashback itself – the underside of the extractor and the tops of the nearest cupboard doors quietly pick up the same film, and want the same degreaser when you get round to them.

How do you stop it building up again?

Nearly all of this is avoidable, and the window for avoiding it is narrower than people think.

The ten-second habit

The whole problem is that fresh grease wipes off and hardened grease does not, and the gap between the two states is short – a matter of cooks, not weeks. Wipe the splashback down while it is still warm from the hob, a damp cloth and nothing else most nights, and the oil never gets the repeated baking it needs to set. Ten seconds while the pan is still ticking on the ring behind you. Do that and the lacquer never forms. Skip it for a month and you are back to the degreaser and the fifteen-minute wait.

The same discipline pays off one shelf up. Pull the metal filter out of the extractor hood every month or two and either run it through the dishwasher or stand it in a sink of hot water with a good slug of degreaser until the grease floats loose. A clean filter catches the oil that would otherwise have ended up on your wall, so the two jobs are really one job done in two places.

Left long enough, the only thing that takes it off is a razor blade held flat to the glass, the amber coming away in little curls you can lift with a fingernail.

an original Victorian chimney breast inside a Kensington, London Victorian terrace house

How To Remove Soot And Grime From An Original London Chimney Breast

Scrape the paint off a chimney breast in almost any Victorian terrace between Walthamstow and Tooting and you find the same thing underneath. A grey-brown film, greasy to the touch and settled into the plaster since before anyone in the street had heard of the Clean Air Act. It does not want to move. Ordinary cleaning slides it around rather than lifting it, and the harder you go at it with a wet cloth the further into the surface it works.

So most of what people do to a sooty chimney breast makes it worse.

Why is the soot on a London chimney breast so hard to shift?

Coal. For the better part of a century the fireplace on that breast burned coal every winter, and coal soot is not simple dust – it is fine carbon, oily tar and water-soluble salts. The tar is what makes it greasy, so it grabs at any cloth you bring near it. The salts are the real trouble: they pull moisture out of the air, which is why a stain you were certain you had beaten comes back as a damp brown shadow every February.

A hundred years of coal fires

London burned more coal, for longer, than almost anywhere on earth. The soot on an original breast is not last winter’s leftovers – it is decades deep, drawn into soft lime plaster that is thirsty and holds onto everything it drinks. On a breast that has been painted several times over, the soot ends up sealed in a layer between the plaster and the paint, hidden but not gone, waiting for damp to carry it back up. And in a front room lived in for a hundred years the soot rarely sits alone – decades of cigarette smoke and the fine grease that drifts in from cooking bake onto the same warm wall, layered over it until the whole breast reads as one flat brown. This is the fact that governs everything else here. You are almost never removing soot from a London chimney breast. You are managing it.

Where do you start, and why not with water?

Dry, always. The instinct is to fill a bucket and get scrubbing, and it is the wrong first move by a distance. Water turns loose soot into a thin black wash that you then drag across the whole breast and press into every pore of the plaster. Wet, it is in for good, and rinsing afterwards only spreads the black wider.

The dry soot sponge

Before any of this, open the windows and lay dust sheets over everything you would rather not repaint later, because dry soot removal throws a fine black powder into the air that finds every surface in the room. Test your method on a low, hidden corner first. And keep the melamine ‘magic’ foam pads away from a breast still wearing old distemper or soft period paint – they abrade, and on fragile paintwork they cut straight through to the plaster underneath.

Start with a vacuum – a soft brush head, held a whisker off the surface, taking up everything loose before you touch the wall with anything else. Then reach for a dry soot sponge, sometimes sold as a chemical sponge or a dry-cleaning sponge: a slab of vulcanised rubber that lifts soot by grabbing at it, used completely dry. Never wet it. You wipe in straight, overlapping strokes from top to bottom, and you do not scrub in circles, because circling grinds the black back in as fast as you lift it. The sponge loads up fast. When one face turns grey, turn it over; when the whole thing is grey, slice the dirty layer off with a bread knife to expose clean rubber underneath and carry on. A single breast can eat half a sponge.

Only once you have taken off everything that will come off dry does a damp step make any sense. For a painted breast, a weak sugar-soap solution and a well-wrung cloth will lift the greasy residue the sponge leaves behind. Work from the bottom upwards – dirty water running down over an area you have already cleaned stains far less than it does running over one you have not – and rinse with clean water as you go. Wear gloves, because sugar soap is hard on skin, and because your hands come away black to the wrist regardless of what you do.

How do you get soot off exposed brick without wrecking it?

On an exposed-brick breast the rules tighten, because the surface you are cleaning is now soft, porous and irreplaceable. Take the loose material off with a soft-bristled brush and the vacuum, working the brush along the mortar joints where soot gathers thickest. For staining that has soaked into the face of the brick, a poultice – a paste laid on thick, left to draw the stain out as it dries, then scraped away – does more, and does it far more gently, than any amount of scrubbing. What you keep well away from old London brick is acid. Brick-cleaning acids and the stronger patio products will scorch the soft face and throw up a white salt bloom for months afterwards. They leave the wall looking worse than the soot ever did. And no pressure washer. Not near soft nineteenth-century brick, not ever. If you do end up with bare brick, resist the urge to varnish or seal it to lock the soot in – old brick needs to breathe, and a trapped, sealed face pushes moisture back out as blown, powdery salt.

Why bare brick is a decision you might regret

Stripping a London chimney breast back to bare brick is, most of the time, a mistake. The yellow London stock brick behind your plaster was laid to be covered. It was never a finish surface, never fired or chosen to be looked at, and it is often sooty right through rather than just on the skin. Bared, it sheds fine dust onto your mantelpiece for years and soaks up every future speck of grime through its open pores. Cleaning it properly after that means damaging it. The exposed-brick breast looks wonderful in an estate agent’s photograph and behaves like a permanent grime trap in a real front room used by real people who cook and light candles. If the plaster is sound, repair any cracks and paint over it.

Why does the stain keep bleeding back through fresh paint?

This is the failure I am called out to more than any other on period breasts, and it is always the same story. Someone cleans off the soot as best they can and rolls ordinary emulsion over the top, pleased with the result – and within a fortnight, or over the first damp winter, a brown shadow rises through the fresh white like a bruise coming up under skin. They repaint. It comes back. They repaint again, heavier this time. It comes back again.

The reason is chemistry. Bad painting has nothing to do with it. Emulsion is water-based, and the tar and salts left behind in the soot are partly water-soluble, so every wet coat you roll on re-wets the old stain and gives it a fresh route up into the new paint. This can carry on for as many coats as you have patience and money for.

One check before you prime, though. Make sure what you are looking at is soot bleeding through and not active damp coming down from a leaking flue or a missing chimney pot. Shellac seals a stain; it does nothing for a wall that is genuinely wet, and sealing over real damp only pushes the trouble a foot along the plaster. If the patch feels cold and wet to the back of your hand rather than just marked, that is a different job, and a bigger one.

Shellac, not emulsion

A tenant on Cazenove Road in Stoke Newington once showed me a chimney breast she had painted three times over a single winter, each coat a little more desperate than the last, the same tea-coloured stain ghosting back through every time. Nobody had told her about primer. The way to stop this is to seal the soot under something water cannot get through, which emulsion is not. A shellac-based stain-blocking primer – the spirit-borne kind, Zinsser BIN being the tin most decorators reach for – isolates the soot completely. One coat, sometimes two over a bad patch, left to dry hard, and the stain is locked behind a barrier water cannot cross. Then your emulsion goes on top and stays the colour you painted it. On that Stoke Newington breast, two coats of shellac and a fresh top coat did it, and it has stayed white since. The soot is all still there behind it. It simply has nowhere left to go.

When is it a job for someone else?

Some of this is not a cleaning job at all. If the plaster on the breast is blown – hollow and crumbling when you tap it with a knuckle – no amount of careful surface work will rescue it, and you want a plasterer who has handled lime plaster, not a general one who will trowel gypsum over a soft old wall and trap damp behind it.

The sweep and the survey

If the building is listed, altering or removing an original fireplace or its surround can need listed building consent, so check before you start prising anything off the wall. And if the fire still draws, or you are tempted to light it, get the flue swept by a certified chimney sweep before anything else. Heavy old soot deposits sometimes point to an unlined or damaged flue, and that is a safety matter that sits well beyond the look of the wall. The same applies if you find the flue has been blocked off and capped at some earlier point – opening it back up for a stove or an open fire is specialist work, not a weekend job with a borrowed chisel.

The soot on that breast has been there longer than you have. Seal it properly and it will still be there long after you have gone – quiet under good paint, exactly where you left it.

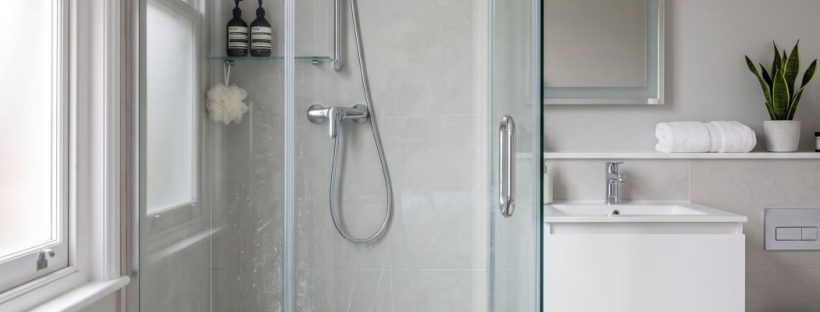
a frameless tempered glass shower door with subtle but clearly visible hard-water residue, faint limescale spotting, light soap scum haze, and delicate mineral streaks that have naturally built up over time

How To Keep Your Glass Shower Door Clear If Your Bathroom Has No Extractor Fan

A clear glass shower door has about a fortnight of good behaviour in it before London water starts leaving its mark. With a working extractor fan you might stretch that. Without one, you won’t. The wet air has nowhere to go, so it settles on the glass, dries there, and leaves behind everything the water was carrying.

That is the whole problem, really. The water evaporates on the glass instead of leaving with the steam.

Why does London water turn shower glass cloudy so fast?

London sits on a great slab of chalk, and the water that reaches your taps in Croydon or Camden has spent years filtering down through it. By the time it arrives it is hard – among the hardest supplied anywhere in Britain, with mineral readings across most of the Thames Water and Affinity areas that put the capital firmly in the “very hard” bracket. Every droplet that dries on your shower screen leaves a microscopic ring of calcium behind. Repeat that a few hundred times and the glass takes on a haze that ordinary cleaning simply will not shift.

The chalk under the city

Soap makes the whole thing worse. When the minerals in hard water meet the fatty compounds in shower gel and bar soap, they bond into a dull grey film that grips glass far more stubbornly than either could alone. It is properly welded on. A fan drags the damp air out of the room before much of this can settle. Take the fan away and the bathroom stays warm and wet for the best part of an hour after you have finished – every tile and seal getting a longer soak than it should. So the cloudiness you are fighting is not one substance but two, layered, and the second one is the reason a quick pass with a damp cloth achieves nothing at all. You wipe, it smears, it dries cloudy again by evening. This is also why the same shower can look filthy in a Streatham conversion and stay glassy in a modern block half a mile away – the water is identical, but one bathroom clears its own air in ten minutes and the other holds it for an hour. The glass is only ever reporting on how long the room stayed wet.

What actually keeps the glass clear day to day?

One tool does more than every spray and cream combined, and it costs about six pounds. A squeegee. Not a cloth, not a chamois – a rubber-bladed squeegee, kept on a hook inside the enclosure where you cannot avoid seeing it.

The squeegee habit

The logic is simple. Limescale forms when water dries on the glass. Remove the water before it can dry and there is nothing left to form. So you pull the squeegee down the screen the moment you turn the shower off, top to bottom, overlapping each stroke slightly, while the glass is still warm and everything comes away in seconds. Thirty seconds, done properly, and the door is dry. Skip it and you hand the minerals exactly the conditions they want.

I will be blunt about this, because it is the part everyone tries to wriggle out of. There is no product, no coating, no clever spray that replaces the squeegee in a bathroom with no extraction. People want to believe otherwise. They want the bottle that means they never have to think about it again, and that bottle does not exist. If you are not willing to spend half a minute a day, nothing else in this article will keep your glass clear for long. It really is that simple, and that annoying.

The habit is the hard part, not the technique. It helps to make the squeegee the last thing your hand touches before you step out, hung at eye level rather than tucked into a corner where reaching for it becomes a faff. Some people keep a second one on the outside of the screen for the panel that faces the room. And once the glass is squeegeed, leave the door wide open. A closed enclosure with no fan is a sealed box of warm damp air, and warm damp air is precisely what feeds the film you are trying to prevent. Open it up and let whatever airflow the room has do its work.

There is one more small thing worth building in: a final cold rinse. Turn the temperature right down for the last few seconds and run cold water over the glass before you squeegee. It knocks the temperature of the panel down, cuts the steam, and gives you slightly less to pull off. Nobody enjoys it in January. It works anyway.

Do all this and you can go a fortnight without proper cleaning. Ignore it and you are back to a limescale battle you can never quite win, waged with ever-stronger chemicals against glass that only gets duller.

How do you ventilate a bathroom with no fan and maybe no window?

Getting the moisture out of the room is the other half of the job, and it is harder when the architects clearly never intended anyone to breathe in there. Plenty of London bathrooms are internal – a windowless slot carved out of a hallway during some 1980s conversion, with a fan that either never existed or gave up years ago.

The dehumidifier question

If there is a window, open it, and open it before you shower rather than after, so the room is not already saturated by the time you start. Leave the bathroom door open too. Cross-flow between the two clears the air faster than either on its own.

Where there is no window at all, a small dehumidifier earns its keep. Run it for an hour after each shower and it will pull litres of water out of the air that would otherwise end up on your glass and your grout. I remember a garden flat off Ladywell Road in Lewisham where the shower sat in what had plainly once been an airing cupboard – no window, a fan that hummed but moved nothing, black mould creeping along the ceiling line. A £40 dehumidifier and a squeegee turned it round inside a month. The mould was a bigger job and a separate one, but the glass came clear and stayed clear, which nobody in that flat had thought possible.

One thing not to do: leave a bath towel draped over the screen overnight. That traps moisture against the glass for eight hours and undoes everything the squeegee bought you. Hang wet things anywhere but there.

What removes limescale once it is welded to the glass?

Sometimes you inherit the problem. New flat, cloudy door, no idea how long it has been allowed to build. At that point prevention is beside the point and you need to strip the glass back to something like its original state.

Vinegar, citric acid, and what to keep off the glass

Acid dissolves limescale, and you have two cheap ones to hand. White vinegar works – warm it slightly, soak a cloth, press it flat against the glass and leave it twenty minutes so the acid has time to bite, then work it over with a non-scratch pad. Warming the vinegar is a faff, granted, but a cold soak barely touches a heavy deposit. Citric acid, a couple of spoonfuls in warm water, does the same job with less of the chip-shop smell and, to my nose and hands, a bit more bite on the stubborn stuff. For a screen that has gone genuinely opaque you may need a dedicated limescale remover and a second pass. Rinse thoroughly and – you saw this coming – squeegee it dry.

What you must keep away from the glass is anything abrasive. Wire wool and the green side of a washing-up sponge will both scratch, and scratched glass holds limescale worse than smooth glass ever did, because now the film has somewhere to key into. Cheap toughened panels mark more easily than you would hope. Once the surface is scored there is no undoing it, so the moment of frustration where your hand drifts towards the scourer is the moment to put the kettle on instead and let the acid do the waiting for you.

Are water-repellent coatings worth it, or a waste of money?

Here is where I part company with half the internet. Water-repellent coatings – the car-windscreen type in a bottle, or the pricier nano-sealants a company will apply for you – are oversold for domestic bathrooms, and in a room with no extraction they are close to a waste of money.

What the sealant actually buys you

The theory is sound enough. The coating makes water bead and run off, so less of it lingers to dry. In a hard-water bathroom used every single day, though, these treatments wear thin within weeks. The high-touch zone around the handle goes first, then the strip where the water hits hardest, and you are left with a screen that is protected in patches and cloudy in others – to my eye worse to look at than an untreated one, because the eye catches the join. The professional coatings last longer and cost a great deal more, and they still need the daily squeegee to earn their price. So you are paying a premium to keep doing the thing that already works for six pounds on its own.

There is a narrow case for a coating, and I will grant it: a screen you have just spent an afternoon stripping back to clear glass takes the treatment better than a tired one, and applied to a fresh surface it can buy you a slightly easier squeegee for a few weeks. Fine. Treat it as a top-up, not a substitute, and do not be surprised when it fades. What you should not do is fit a coating and quietly drop the daily habit, which is exactly what most people do the moment they have paid for one.

Spend the money on a good squeegee and, if the room truly needs it, a dehumidifier. That is the honest version of the advice, even if it sells nothing.

A clouded shower door in a London flat is a drying problem dressed up as a cleaning one. Sort the drying and the glass mostly looks after itself. Everything else is a squeegee you have not picked up yet.

How to Keep Your Gaming Setup Clean and Dust-Free

A clean gaming setup isn’t just about aesthetics; it plays a crucial role in enhancing performance and extending the life of your equipment. The benefits are substantial, from ensuring smooth gameplay to preventing overheating.

This article explores essential tools and supplies to keep your space dust-free, provides a step-by-step guide for a thorough clean, and shares tips to prevent dust build-up. Additionally, it addresses how to deal with stubborn dirt.

Gaming screen and console setup

The Importance of Keeping Your Gaming Setup Clean

Keeping your gaming setup clean is extremely important—not just for appearance but also to enhance your gaming performance and prolong the life of your equipment. A tidy, dust-free space helps reduce the chances of dust accumulating on your hardware, which can cause overheating and slow things down.

You certainly don’t want your gaming chair or PC case turning into a sanctuary for allergens and dirt, do you? Following some simple cleaning and maintenance practices can significantly elevate your gaming experience and ensure your peripherals function at their best.

Benefits for Performance and Longevity

When dust piles up, it can restrict airflow and lead to overheating, which is the last thing you want for your console, PC, keyboard, or mouse. Regular maintenance through proper cleaning methods improves air quality and enhances your overall gaming experience.

A clutter-free environment can help you maintain focus and reduce distractions during those intense gaming sessions, allowing you to concentrate better and improve your response times. Furthermore, regularly cleaning your equipment protects your investment and keeps those sensitive electronic components safe, saving you from costly repairs or replacements.

By prioritising dust control and keeping your surfaces clean, you can create a healthier, more enjoyable space that encourages creativity and immersive gameplay.

Tools and Supplies for Cleaning

Having the right tools and supplies is essential to keeping your gaming setup clean and dust-free. You’ll want to grab essentials like a microfibre cloth for delicate surfaces, a dusting brush for tricky spots, and a vacuum cleaner designed specifically for electronics.

These tools can make cleaning less daunting and more efficient. Investing in a solid cleaning kit tailored for your gaming equipment will provide you with everything you need to keep your space immaculate.

Essential Items for a Dust-Free Setup

To achieve that dust-free gaming setup you’ve always wanted, there are a few essential items you definitely want in your cleaning arsenal. Surface wipes are your best friend for quickly tackling spills and stains, while a good screen cleaner is crucial for keeping your monitor looking smudge-free. Don’t forget about anti-static tools; they help protect your gaming peripherals from those pesky dust particles that can accumulate over time, ensuring your gaming experience stays top-notch.

In addition, microfibre cloths are fantastic for gently dusting surfaces without leaving scratches, and a vacuum with a brush attachment is perfect for snatching up dust from those tricky spots. Adding a can of compressed air to your toolkit is also a must; it’ll help you blow out the dust that builds up inside your console or PC.

These tools work together like a well-oiled machine, making sure your gaming gear is spotless and stays in great shape, enhancing performance and longevity.

By incorporating these simple yet effective tools, you can enjoy an immersive gaming experience without the distractions that dust can bring.

Cleaning Your Gaming Setup

Cleaning your gaming setup doesn’t have to feel like a never-ending chore. Following a simple cleaning guide can turn it into an easy routine that keeps your workstation looking smart.

Schedule regular cleaning sessions where you dust off your gaming peripherals, sanitise surfaces, and keep everything organised. With the right cleaning solutions and techniques, you’ll be able to tackle that pesky dusk build-up and create a hygienic environment for your gaming adventures.

Step-by-Step Guide for a Thorough Clean

To keep your gaming setup clean and clutter-free, follow this simple step-by-step cleaning routine. Start by gathering your cleaning supplies—think disinfectant wipes for surfaces, a dusting brush for those pesky cables, and microfibre cloths for your monitor and peripherals. Dust every nook and cranny, and remember to use the right products on surfaces to avoid any damage.

Once you’ve got your supplies ready, unplug your devices to kick things off safely. Start dusting off the larger surfaces, like your desk and shelves, using a microfibre cloth to keep scratches at bay. A quick disinfectant spray for your keyboard and mouse will help zap those germs, and a soft brush will dislodge any trapped debris. Don’t forget to check behind your setup, where dust loves to play hide-and-seek.

Next, organise your cables and toss any unnecessary items to tidy your workspace. Sticking to this routine makes your gaming area look great and helps your gear last longer.

Preventing Dust Build-Up

Preventing dust build-up in your gaming setup is key to maintaining your performance at its peak and extending the lifespan of your equipment.

You can implement some effective dust management practices, such as organising those cables and ensuring plenty of airflow around your gaming console and PC case.

Remember to pay attention to your environment as well—factors like humidity and air quality can significantly affect how much dust accumulates.

Tips for Maintaining a Clean Setup

To keep your gaming setup looking sharp, implement some practical tips that focus on how often you clean and how you organise your workspace. Regular cleaning sessions can help you stay ahead of that pesky dust, while placing your gaming chair and equipment ergonomically will keep everything tidy.

Trust me, adopting some effective cleaning hacks will make this whole process much simpler and more efficient.

Make it a habit to Wipe down your surfaces weekly to keep the grime at bay. And don’t forget about those peripherals—they can be the dirtiest spots in your gaming area. Designating specific spots for each item makes things easier to find and enhances your overall gaming experience.

You should explore maintenance tips like using microfibre cloths for your screens and investing in a cable management system to help eliminate clutter. Plus, adjusting your equipment’s height can help you stick to those important ergonomic practices, allowing you to enjoy longer gaming sessions without the chaos around you.

Dealing with Tough Dust and Dirt

Encountering tough dust and dirt is just part of the game, but knowing some effective solutions can make your cleaning process easy.

When those stubborn spills and stains appear on your gaming gear, specialised cleaning products designed for electronics will be your best friends. And don’t forget about a powerful hoover to tackle that dust hiding in those hard-to-reach spots.

Don’t let dirt ruin your gaming experience; take charge with the right tools and be ready to go.

Effective Solutions for Stubborn Build-Up

When you’re dealing with a stubborn build-up of dirt and dust in your gaming setup, using the right cleaning methods can really make a difference. Grab some microfibre cloths and those specialised cleaning kits made for electronics—they’re perfect for getting your gaming peripherals squeaky clean.

Plus, regular maintenance can go a long way in preventing future messes and keeping your space tidy.

Incorporating these cleaning habits into your routine breathes new life into your devices and boosts their performance. For example, a can of compressed air is your best friend for dislodging grime from those tricky spots, especially around key switches and ports. Remember to use gentle cleaning solutions for electronics; they won’t mess up sensitive surfaces.

And don’t forget to dust and wipe down surfaces regularly with the right cloths. This way, your gaming setup stays in top shape, ready to deliver an immersive experience without any distractions from dirt and clutter.

How to Effectively Clean and Deodorise Your Fridge

Do you know the possible health hazards if you forget to clean and deodorise your fridge regularly?

Let’s discuss why keeping your refrigerator clean and smelling fresh is crucial. We’ll also talk about the supplies you’ll need for a successful cleaning session. We will walk you through a step-by-step process to properly clean and deodorise your fridge. We’ll cover everything from prep work and disinfecting to keeping your fridge fresh and clean.

We’ve got some excellent tips and tricks coming your way to help you stop odours and spills in your tracks!

Supplies Needed for Cleaning and Deodorising

Why Regularly Cleaning and Deodorising Your Fridge is Important

You know, keeping your fridge clean and smelling fresh is important. Not only does it help you maintain good hygiene, but it also keeps your food nice and organised.

Regularly cleaning your fridge can eliminate funky smells, prevent mould from creeping in, and extend its lifespan. Proper cleaning techniques and tips can also improve how you store and organise your food, creating a healthy and welcoming kitchen space.

Potential Health Risks

If you neglect to clean and deodorise your fridge, you could set yourself up for some health hazards. Things like mould, mildew, and bacteria love to hang out in dark, damp places like your neglected fridge.

Mould can spread like wildfire, contaminating your food and releasing nasty mycotoxins. Mildew can make everything smell musty and ruin the taste of your stored goodies. Bacteria, including troublemakers like Salmonella and E. coli, can multiply quickly on improperly stored foods.

You must ensure your fridge is well-ventilated to prevent moisture buildup. Too much moisture is like a welcome mat for mould and bacteria. And watch out for cross-contamination—if juices from raw meat or poultry drip onto ready-to-eat foods, you could end up with nasty illnesses like salmonellosis or listeriosis.

Supplies Needed for Cleaning and Deodorising

Gather all the right supplies when you’re ready to clean and deodorise. For an eco-friendly cleaning option, opt for natural and homemade products like bicarbonate of soda, vinegar, and lemon.

Essential Items for an Effective Clean

For an effective cleaning session, you must have removable and washable containers, the right cleaning products, and items to sanitise surfaces. When you’re tackling the fridge, make sure you’ve got a sponge or soft cloth handy for wiping down shelves, a gentle detergent to tackle those stubborn stains, and a multipurpose cleaner to disinfect everything.

Keeping the temperature in check is crucial to preventing food from going off, so make sure to unplug the fridge or adjust it to the right setting during the cleaning process. Don’t forget about proper air circulation! After cleaning, leave the fridge door open to let any lingering smells float out.

Why Regularly Cleaning and Deodorising Your Fridge is Important

Step-by-Step Guide to Cleaning and Deodorising Your Fridge

Follow a detailed step-by-step guide to clean and deodorise your fridge. This way, you’ll cover all the bases, from scrubbing away stains to disinfecting and giving the whole unit a fresh, clean scent.

Preparation and Disinfecting

When you’re gearing up for a fridge clearout, remember that preparation is everything. First, clear out all your food items and disinfect your fridge using eco-friendly solutions.

By starting with this initial step, you’ll have a nice, clean slate to work with, making it easier to tackle every nook and cranny of your fridge. Going the eco-friendly route not only minimises your exposure to harsh chemicals but also plays a part in keeping the environment healthier.

When disinfecting, pay extra attention to those high-touch spots like shelves, door handles, and drawers to keep bacteria at bay. A simple mix of water and vinegar can do wonders for cleaning and sanitising while being gentle on your fridge surfaces. And don’t forget to rinse everything thoroughly after cleaning to remove any leftover residue, ensuring a safe space to store your food.

Removing and Cleaning Shelves and Drawers

To thoroughly clean your space, you must remove all shelves, drawers, bins, and compartments. Take them out individually and scrub them with mild detergent and warm water. Make sure to eliminate any grime or spills, especially in those nooks and crannies where dust loves to hide.

Once you’ve scrubbed everything, rinse each piece well and let it air dry completely before putting it back. By cleaning each item separately, you can be sure that every surface is thoroughly sanitised, creating a healthier living environment.

Cleaning the Interior and Exterior

To get your fridge looking spick and span, it’s time to roll up your sleeves and tackle both the inside and outside. Pay close attention to those pesky stains, spills, and spots that often go unnoticed, like the handles, seals, and gaskets.

First, clear out the fridge and remove any removable shelves and drawers. Then, grab a mix of warm water and a mild detergent to wipe down the interior surfaces, really getting in there to scrub away any hard-to-remove spots.

For stubborn stains, whip up a paste of baking soda and water and gently scrub away. To kill off any lurking bacteria, disinfect the surfaces with a mix of water and white vinegar.

And don’t overlook those handles, seals, and gaskets – they can be real hotspots for grime and bacteria if they’re not cleaned regularly.

Maintaining a Fresh and Clean Fridge

To keep your fridge smelling fresh and looking clean, you need to put in some effort and use smart deodorising techniques. Follow these simple tips and make them part of your regular routine. That way, your fridge will run smoothly, your food will be stored well, and the air will circulate properly.

Tips and Tricks for Preventing Odours and Spills

To keep odours and spills at bay in your fridge, you can rely on natural products like bicarbonate of soda, activated charcoal, lemon, and vinegar. These items soak up moisture and eliminate funky smells.

Not only are these natural solutions effective in neutralising odours, but they’re also eco-friendly options compared to harsh chemicals. For example, you can pop an open container of bicarbonate soda in there to absorb odours or use activated charcoal for some serious stink-fighting power. Slices of fresh lemon or diluted vinegar can also help tackle lingering odours.

Using suitable containers to store food can also help prevent spills and cross-contamination. This keeps your fridge clean and organised and supports sustainable practices in your kitchen.

The Benefits Of Hiring A Home Cleaner

If you decide, you can effortlessly hire the services of a house cleaner by calling or booking online. Decide on the type of home cleaning service you want to find.

Hiring a house maid will make your life easier

Wise people say that purity opens the door to holiness. The sparkling house gives the individual complete peace and health and makes life prosperous. The calm and tidy home atmosphere calms the mind, and for some people, it turns out to be their little place for bliss. Cleaning the house is essential, but it is not an exciting activity for most people. The concept of home cleaning, which includes activities such as dusting, vacuuming, ironing, etc., looks exhausting and time-consuming, especially for those fully engaged in their professions. It takes valuable time to rest and refresh and eliminates energy when you want to have fun.

That is where household cleaners play a significant role. Home cleaning can be one of the highest-paid jobs in the UK. It also offers employment opportunities to thousands of people hired to clean the homes of clients who do not have time to clean themselves. These professionals can clean the entire home according to customer requirements. They can pay attention to any room in the house by rubbing dirty surfaces, disposing of waste, vacuuming and mopping, and cleaning windows. And that’s not all. Even spaces which require careful home cleaning, such as toilets and the kitchen. Some cleaners even offer ironing and laundry services to make busy owners’ lives more comfortable. Most service providers set an excellent standard in their work, integrating ethics such as competitiveness, reliability, dedication and sincerity to provide the customer with superior service.

One can effortlessly hire the services of house cleaners by phone or online reservation. You can organise cleaning as desired on a weekly, biweekly or monthly basis. The owner can also expand the provisions on which components to clean and which parts to leave as they are. Some providers also offer key storage services so that home cleaners can still enter the home and complete their tasks even if the customer is absent.

Decide on the type of household cleaning service you want to find. Make a list of the specific duties you want the cleaner to perform. Also, decide if you would choose permanent or short-term help.

After choosing the best free web content for potential customers, you must perform a background check. Search for the necessary data to ensure the security of your house. Identifying the potential client’s records is crucial to avoid future problems. Discuss with appropriate people about the remuneration of the domestic helper. You may also want to obtain insurance documents that would reimburse the cost of a home cleaner if they are injured during work. You must sign appropriate documents, such as a legal agreement, in the presence of a lawyer to avoid litigation.

How to find the perfect home cleaning help in London?

How to choose the best London home cleaning contractor

If you are busy and need more time to clean your house, you should consider using domestic cleaners in London. There are many home cleaning suppliers on the market. Due to the tremendous variety and number of companies, finding the perfect home cleaning service is now a significant challenge.

So how would you start looking for a reliable cleaning business? If you are looking for ways to find the best service provider, the following guidelines will help you.

  1. Determine the area to be cleaned
    Firstly you should identify the areas that need care. That gives the wipers a clear guide to what you are looking for. In other words, do you need it for window cleaning, laundry, standard cleaning, or other cleaning activities?
    If you do not assign precise tasks to the cleaners, they will go through the cleaning standards and thoroughly clean all areas.
  2. Research
    To hire the best home cleaning helpers, you will need to research. When it comes to research, you will need to ask questions, search online and even check customer satisfaction. Most people are always happy to share their positive experiences. For this reason, asking your neighbours, relatives, and friends would not be wrong. Most cleaning agencies give bonuses through referrals. Take advantage of this, and you will surely get an effective company.
  3. Elimination process
    Once you have gathered information about several different businesses, applying an elimination method is next. Start eliminating companies that are not insured. As with anything, accidents can happen, so you need a company that can take responsibility for problems.
  4. Connecting with the most suitable cleaning agencies for homes
    Once you’ve eliminated all service providers that don’t meet your criteria, you can start calling those you think are of good quality. The goal is to book an agency that will meet all your standards at the most cost-effective cleaning prices. Remember that the cleaning company you choose must be experienced and reliable. If you are not comfortable with the cleaners that the company sends, you can always ask for a new team.
  5. Free consultation
    As soon as you find the perfect cleaning service for your requirements, you should make an appointment to meet with the cleaners – we recommend that it be in your home. When meeting with the cleaners, it is essential to ask questions about training, experience and whether the agency has public insurance. Also, request references and a review of their portfolio.
    This first meeting considers reviewing the work you want them to do. During this consultation, you will determine which time is ideal for the service. It is also crucial to ask the cleaner any questions and clarify anything you are unsure about. Once you have agreed, all that remains is for the service to begin.
    Keep in mind that whenever you are looking for a home cleaner in London, you need to research and ensure that the person you hire is reliable.
  6. Fees
    A key factor to consider and discuss is the cost of the cleaning service. You should determine it during the initial meeting with the wipers. Holding the initial meeting at your property allows the agency to review the size of the home and the number of cleaning sessions required. The property size affects how many cleaners are needed and the frequency of services. These details ultimately contribute to the fee. Set a financial budget to ensure the accessibility of the service. If the cost is too high, you should ask for special offers, or you can look for another cleaning agency offering lower prices.

Easy Home Cleaning Tips

Let’s be frank – our modern lifestyle leaves little time for cleaning. Sometimes dust accumulates, and empty packages, cups, and plates pile up in the rooms unless we spend our whole day walking around the house. That’s why we decided to describe some easy ways to clean three main rooms at home quickly. Each will take you no more than 15-20 minutes but significantly improve the home’s appearance.

Quickly refresh the living room

The living room is where everyone spends the most time. It is often more cluttered than other rooms and gets dirty faster. Here’s how to quickly clean this room:

  • You often leave at least one or two cups on the coffee table, even if the room is clean. Collect and put them in the kitchen sink or the dishwasher.
  • If there are packages of popcorn, chips, or plastic bottles, collect them and throw them in the trash.
  • Wipe dust off the TV and other black appliances – instantly refreshing the living room.
  • Quickly run a vacuum cleaner around the table and sofa – it usually collects the most dust, crumbs and small debris.
  • Clean your pet’s hair from furniture.
  • Leave the cleaning of the curtains, upholstery, windows and carpet when you have time for a more thorough home cleaning.

Quick kitchen cleaning

  • It is the other room in the house that gets dirty quickly. Here are some tips for quick kitchen cleaning:
  • Collect empty packages and old leftovers and throw them in the trash.
  • If dirty dishes, cups and utensils are left on the table, put them in the sink or dishwasher.
  • Wipe the counter tops and table with a damp cloth and surface cleaner. If you prefer environmentally friendly home cleaning, use vinegar and water.
  • Sweep the floor, at least around the counter and dining table. If you are not in a hurry – wash the tiles with a mop immersed in warm water in which you put a few drops of detergent.
  • Leave the big tasks – like cleaning the oven and refrigerator – for another time.

Clean the bathroom and toilet quickly

If you need more time to clean the house, use these tips to clean the bathroom and toilet quickly.

  • Rinse the inside of the toilet bowl with disinfectant and leave it on for 10-15 minutes.
  • Put 1-2 drops of disinfectant on a damp sponge and wash the sink and shower faucets.
  • Pour 1-2 caps of detergent into a bucket of warm water and wipe the floor.
  • Replace used face and body towels with clean ones.
  • Wipe the mirror with a suitable detergent and a towel.
  • Rinse the disinfectant from the toilet as soon as you have finished everything else.

If you often apply these tricks to refresh the living room, kitchen and bathroom quickly, you will save a lot of effort when it comes time for a more thorough house cleaning.

Dust cleaning at a higher level

Blankets, pillows, bathrobes, curtains and other textiles trap house dust and create it as they disintegrate and crumble. Curtains and draperies are dusty because they absorb moisture and dirt from the outside. The best idea is to buy washing machine items and wash them twice a year. Textile products that cannot be washed in the washing machine can clean in the dryer with a heat-free program for 20 minutes and a damp cloth. It will attract pet hair, and the swirling movements and airflow will remove smaller particles.

Cleaning under the carpet

The carpet is the largest tank of house dust. It is a source of fibre and absorbs dust particles like a giant sponge. In addition to its soft part on top, its reverse part also contains dust. It is best to clean the top and bottom regularly if you suffer from allergies. Although it may be time-consuming to lift the carpet, which is laid from end to end in the room, ask for help and try to go with the vacuum cleaner and below. If this makes you uncomfortable, make a radical decision and replace carpets with hard floors such as laminate, wood, tile or vinyl. Clean regularly with a cleaning solution and a microfibre cloth. Sweeping redistributes the dust rather than removing it.

Robot vacuum cleaner

If your pet’s fur is constantly in your home or children always spill and stain something, then the robot vacuum cleaner is the best investment you can make in the name of your clean house. This solution will help you not feel tired from constantly bending over, wiping, and dusting dirt.

Choose the right robot vacuum cleaner for you

Orient yourself to one that cleans itself without your intervention. At the same time, it must be powerful and capable of precise navigation. This way, you will not have to constantly operate the robot vacuum cleaner, move it manually, and direct it with a remote control so that it does not collide with objects in your home.

Precise navigation and efficient cleaning

The robot vacuum cleaner cleans your home more thoroughly and efficiently thanks to accurate maps of the premises, reasonable location calculation and optimisation of the cleaning trajectory. The ability to set “restricted areas” for the robot, which prevent it from operating in certain places, despite the lack of a physical barrier, is also beneficial. Conversely, you can specify areas where you want it to be cleaned. For example, such an area may be under the dining table after a family dinner when the floor below is full of crumbs and the rest of your home is clean.

Effective cleaning of any flooring

The highly efficient brush of the robot vacuum cleaner has thin fibres of soft textile fabric and antistatic silver threads. The extractors press the hairs to not become entangled around the brush. With the possibility of remote control, you can control its operation in real-time, no matter where you are. You can let it clean while you’re in the office, and when you get home, enjoy your clean home and relax on the couch.

The camera is also a fun and functional extra for the new intelligent vacuum cleaners. You can observe your home from a distance when you are out and want to check if everything is OK at home. You can also monitor what your pet does while you’re at work and where it hides your personal belongings, which mysteriously disappear.

These robots simplify housekeeping, taking total care of the home’s cleanliness.

Prevent the accumulation of dust

Preventing the accumulation of dust is an almost impossible task. However, reducing the amount of dust in your home is quite feasible. Changing some decorations and cleaning regularly can prevent dust from accumulating in your home. Here are some ways to reduce dust accumulation:

  1. Keep windows and doors closed;
  2. Use mats;
  3. Maintain the flooring;
  4. Change and wash bed linen and towels every week;
  5. Get rid of unnecessary items that collect dust;
  6. Use appropriate cleaning tools – for example, a microfibre cloth, not a feather brush;
  7. Take care of your pets.

The Domestic Cleaning – More Than Home Maintaining

The modern ground surfaces are very susceptible to dust and dirty air. The condition of the floor would be a major task for every passionate housekeeper and housewife.

Carpet maintaining is also a basic part of domestic cleaning. If we want to look on its best, we have to remember that the grime and the microbes can easily be embedded in the fibres of the textiles. In this case, the cleaning solution has to be friendly towards the carpet, but most effective in rejecting the dirt.


The windows and the state of entrance make the first impression which is the most important when someone comes in. So your home/house needs regular and painstaking care if you want to feel wonderful in it and to live in a healthy and relaxing environment.


The science tests show that the clear dwellings, the good atmosphere and the fresh air condition impact on the positive attitude towards everything around us. The washed and tidy rooms influence on our ability to cope with thе challenges. We are calm, balanced and ready for business growth, personal development and freedom of mind.